How Reviewfy.io works
User Flows
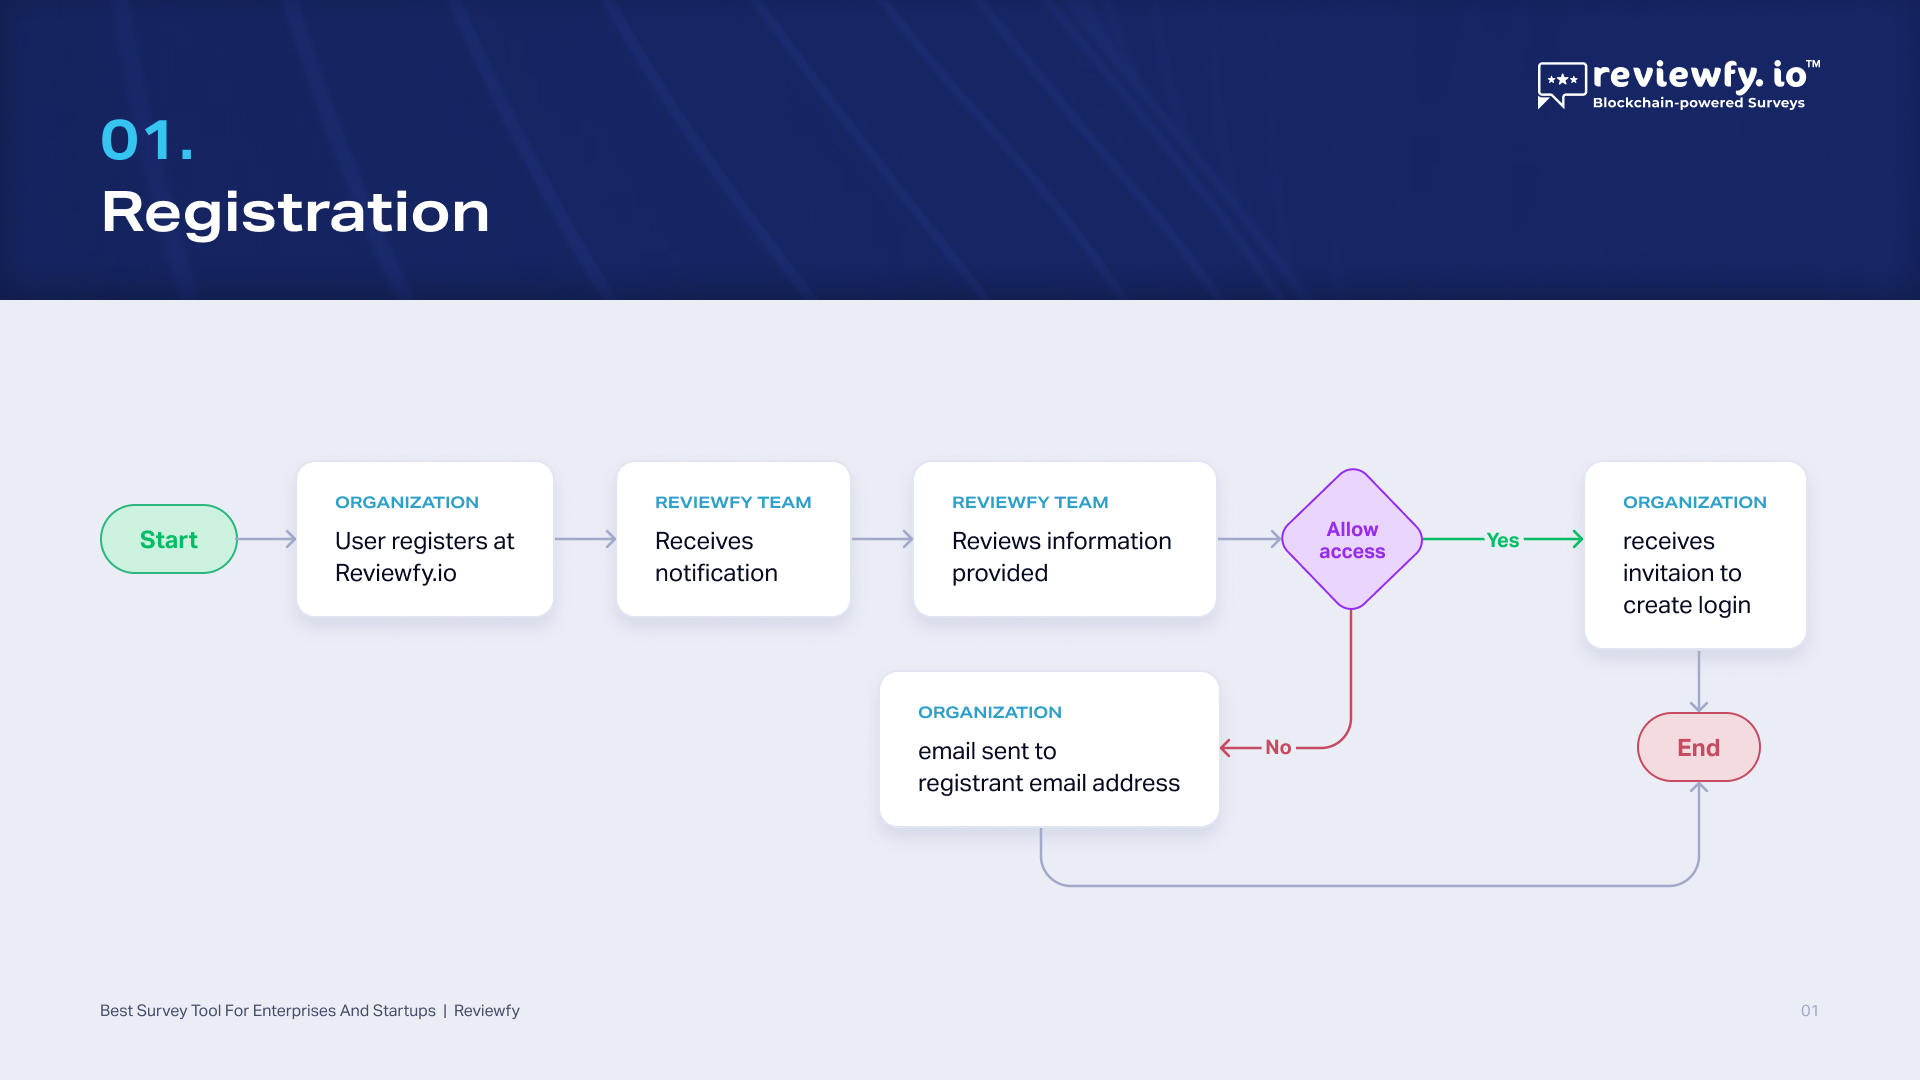
01. Registration
02. First User account activation

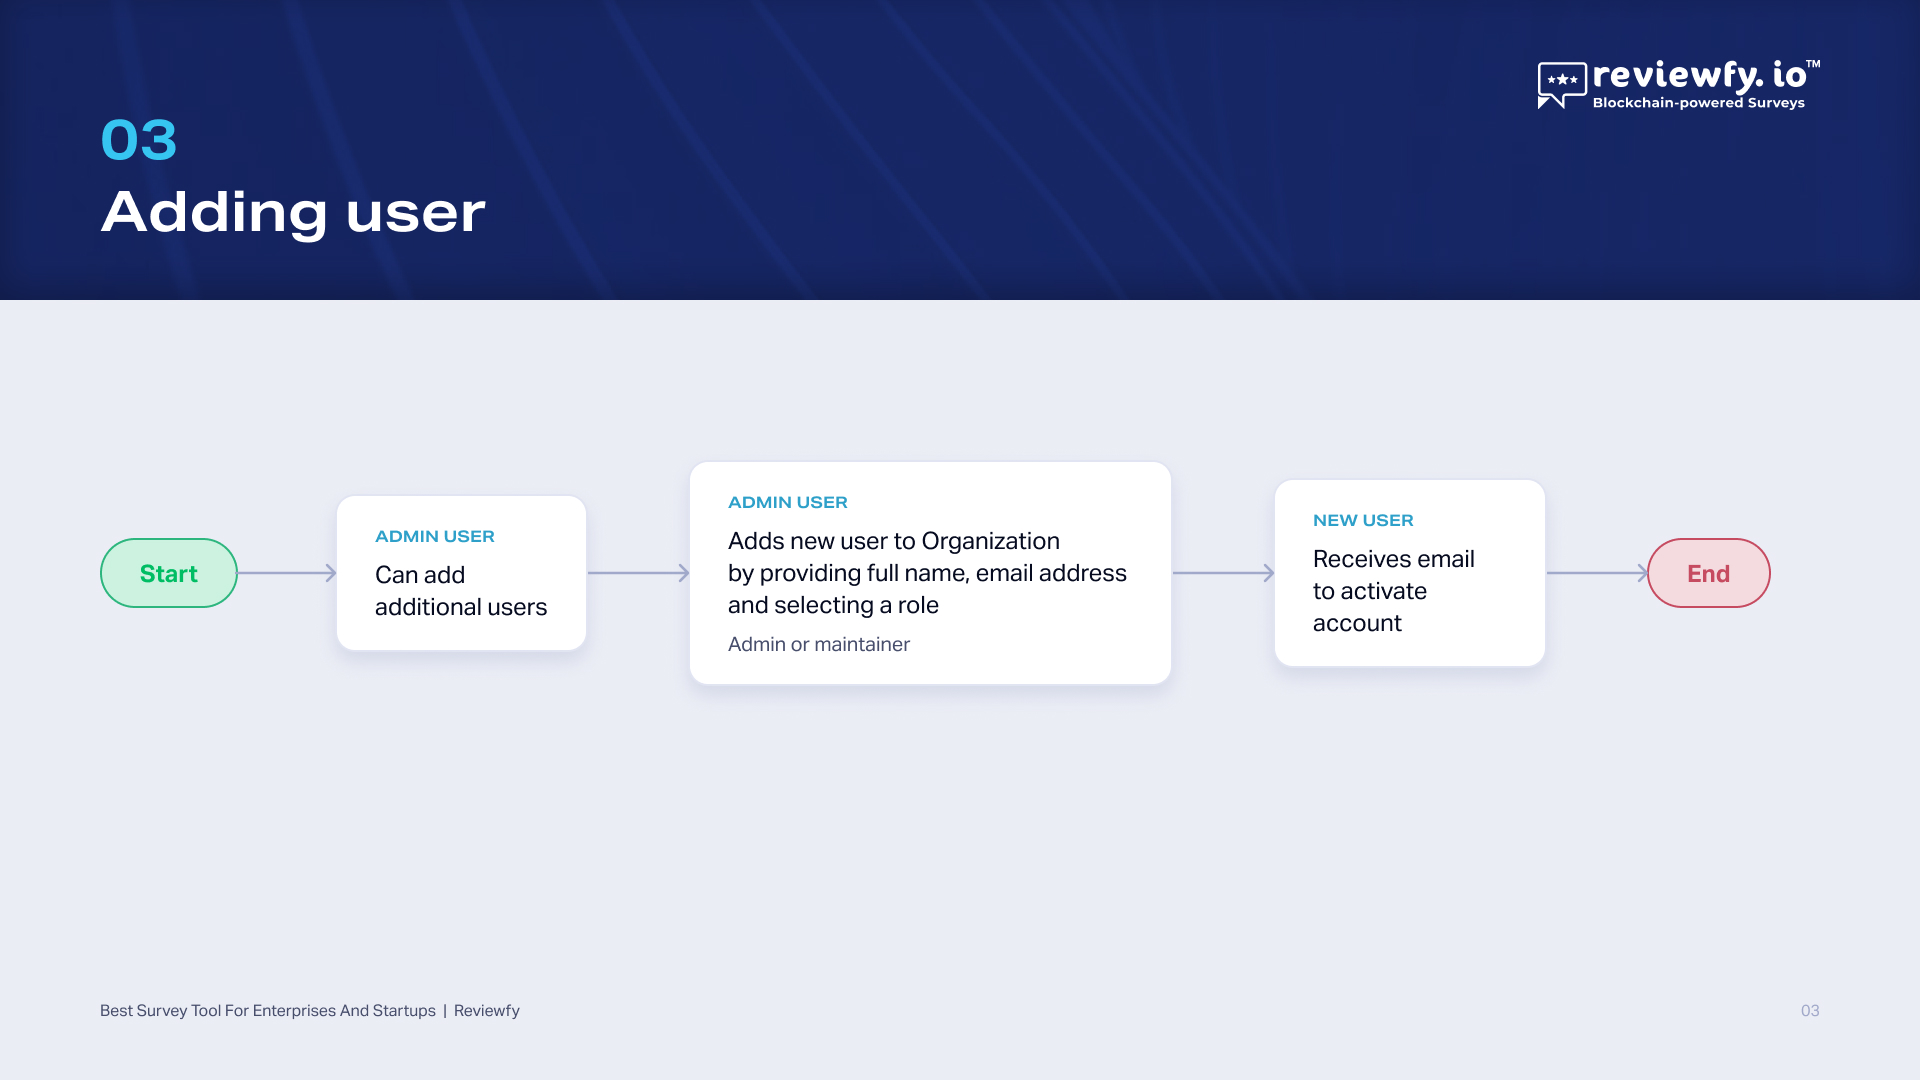
03. Adding user
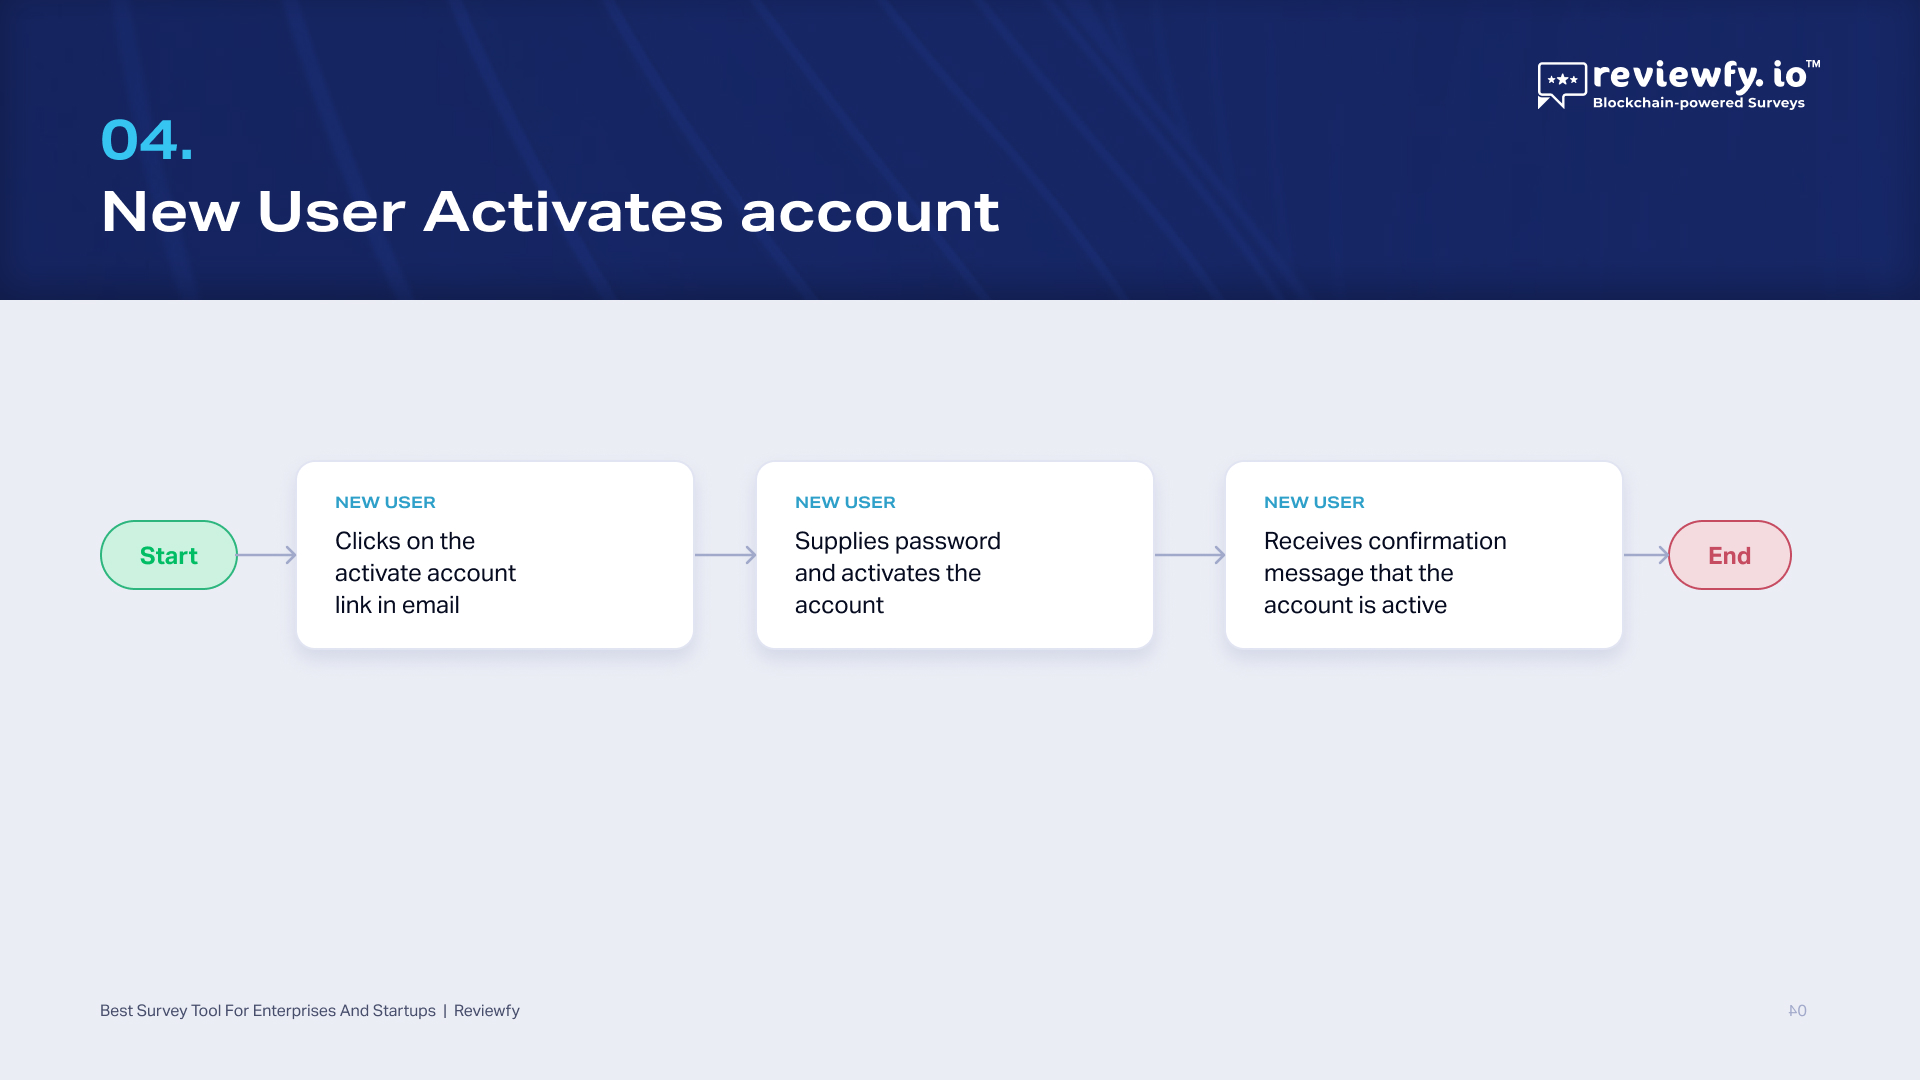
04. New User Activates account
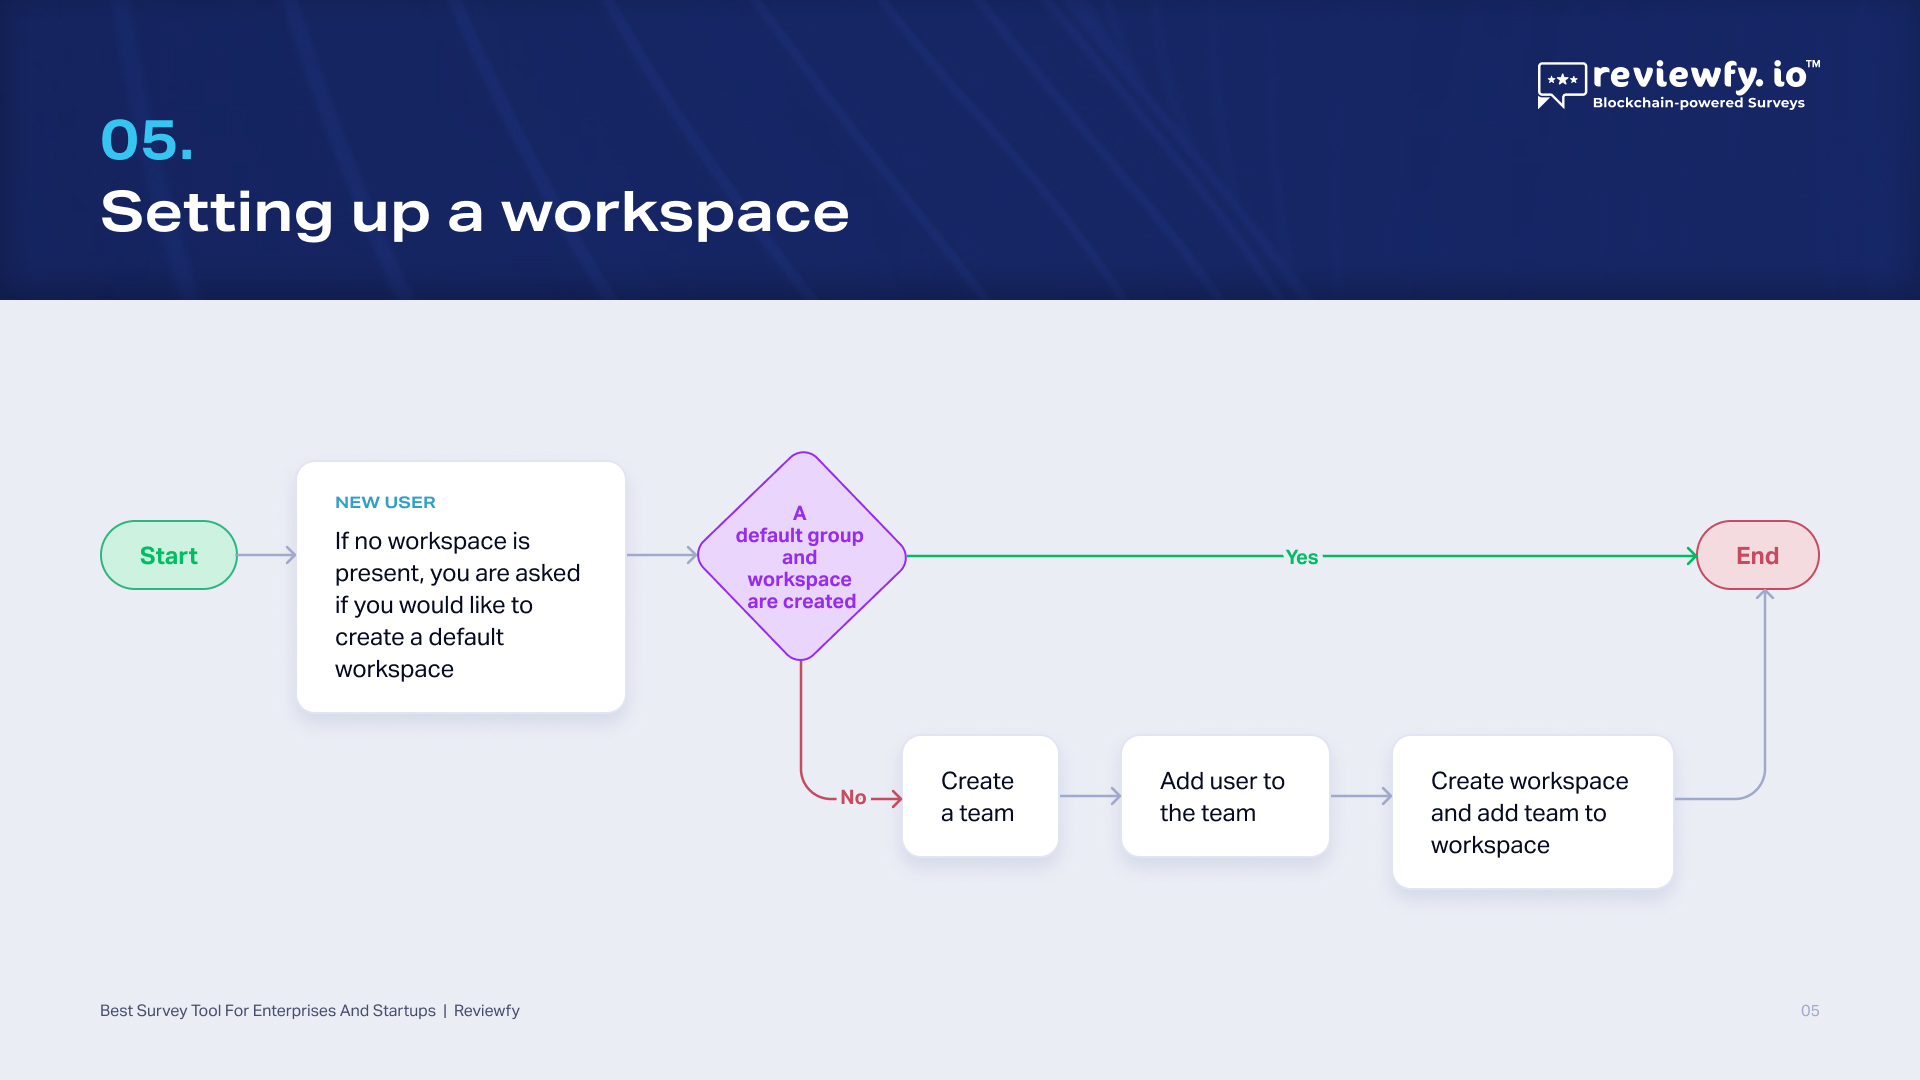
05. Setting up a workspace
06. Create a question

07. Create a form
08. Enabling Free Email
09. SendGrid to send email
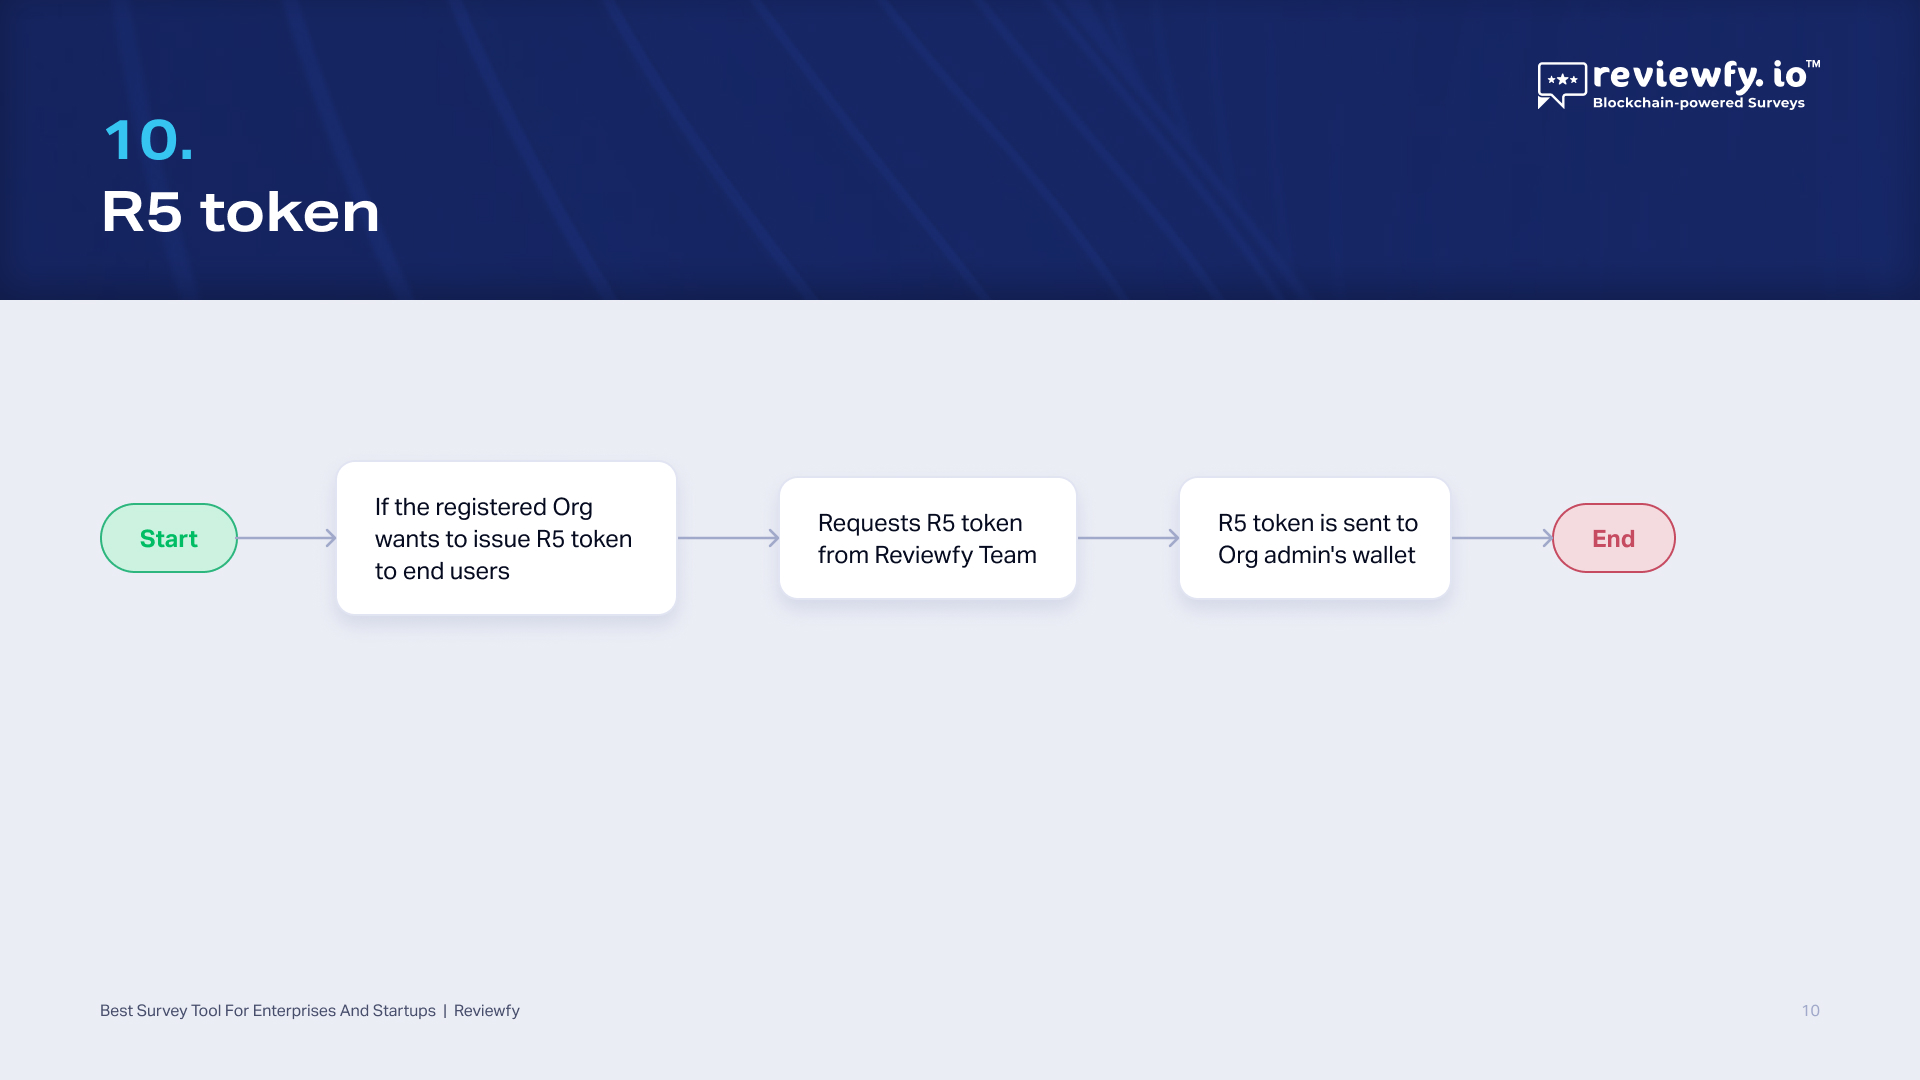
10. R5 token
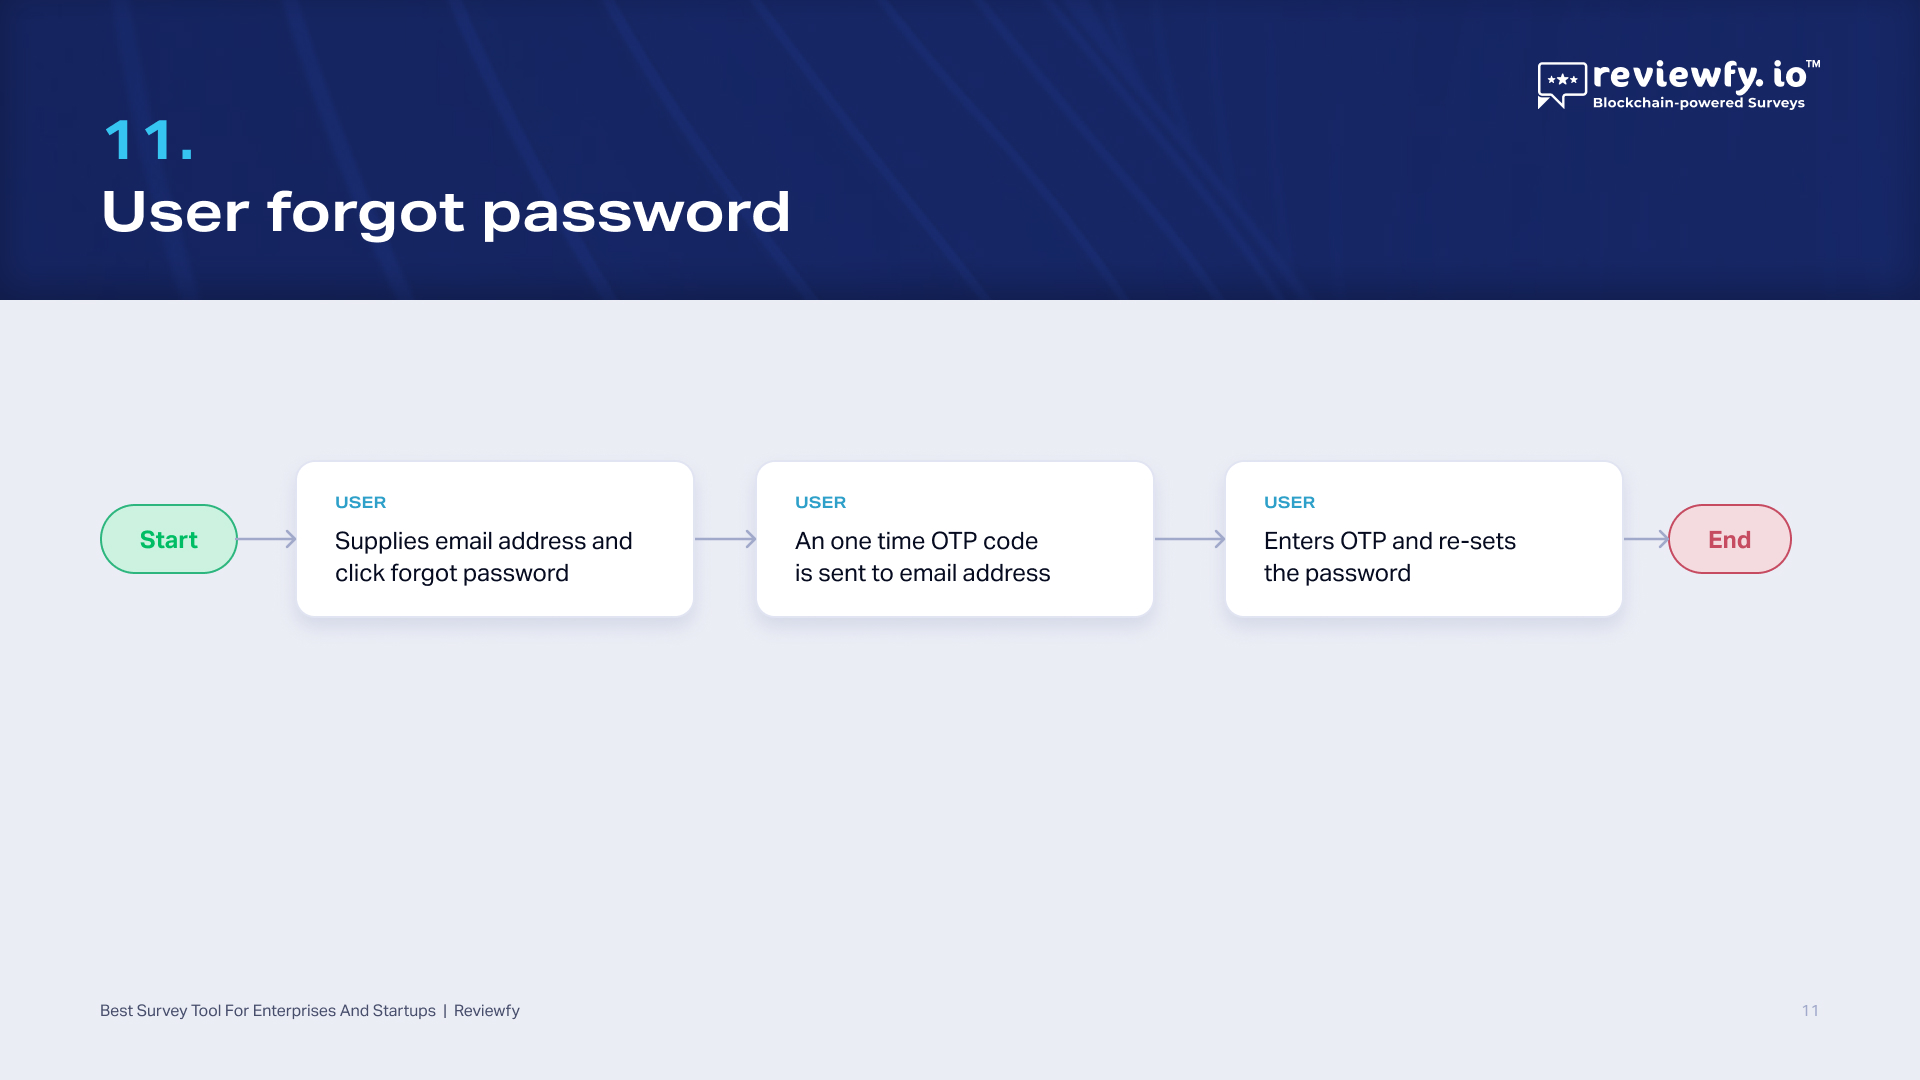
11. User forgot password
Setting up your work space
After you log into your Reviwfy.io account, the first task is to create WorkSpace.
- Click on Teams: There are two options: People and Group
- Click on People and then click on Add User
- The right side panel has 3 columns. Input details for the user you want to add. Apply Add User.
- The user is added along with the role assigned
- Go to Groups: Multiple users form a Group based on task performed
- Create New Group
- Assign a name to the Group and give a description about the Group’s task/function
- Add users to the group: Select one or more users from the drop down list
- Go to Workspaces . Click Create Workspace : Assign a name to the Workspace
- Add the Group / Groups that would operate within this Workspace.
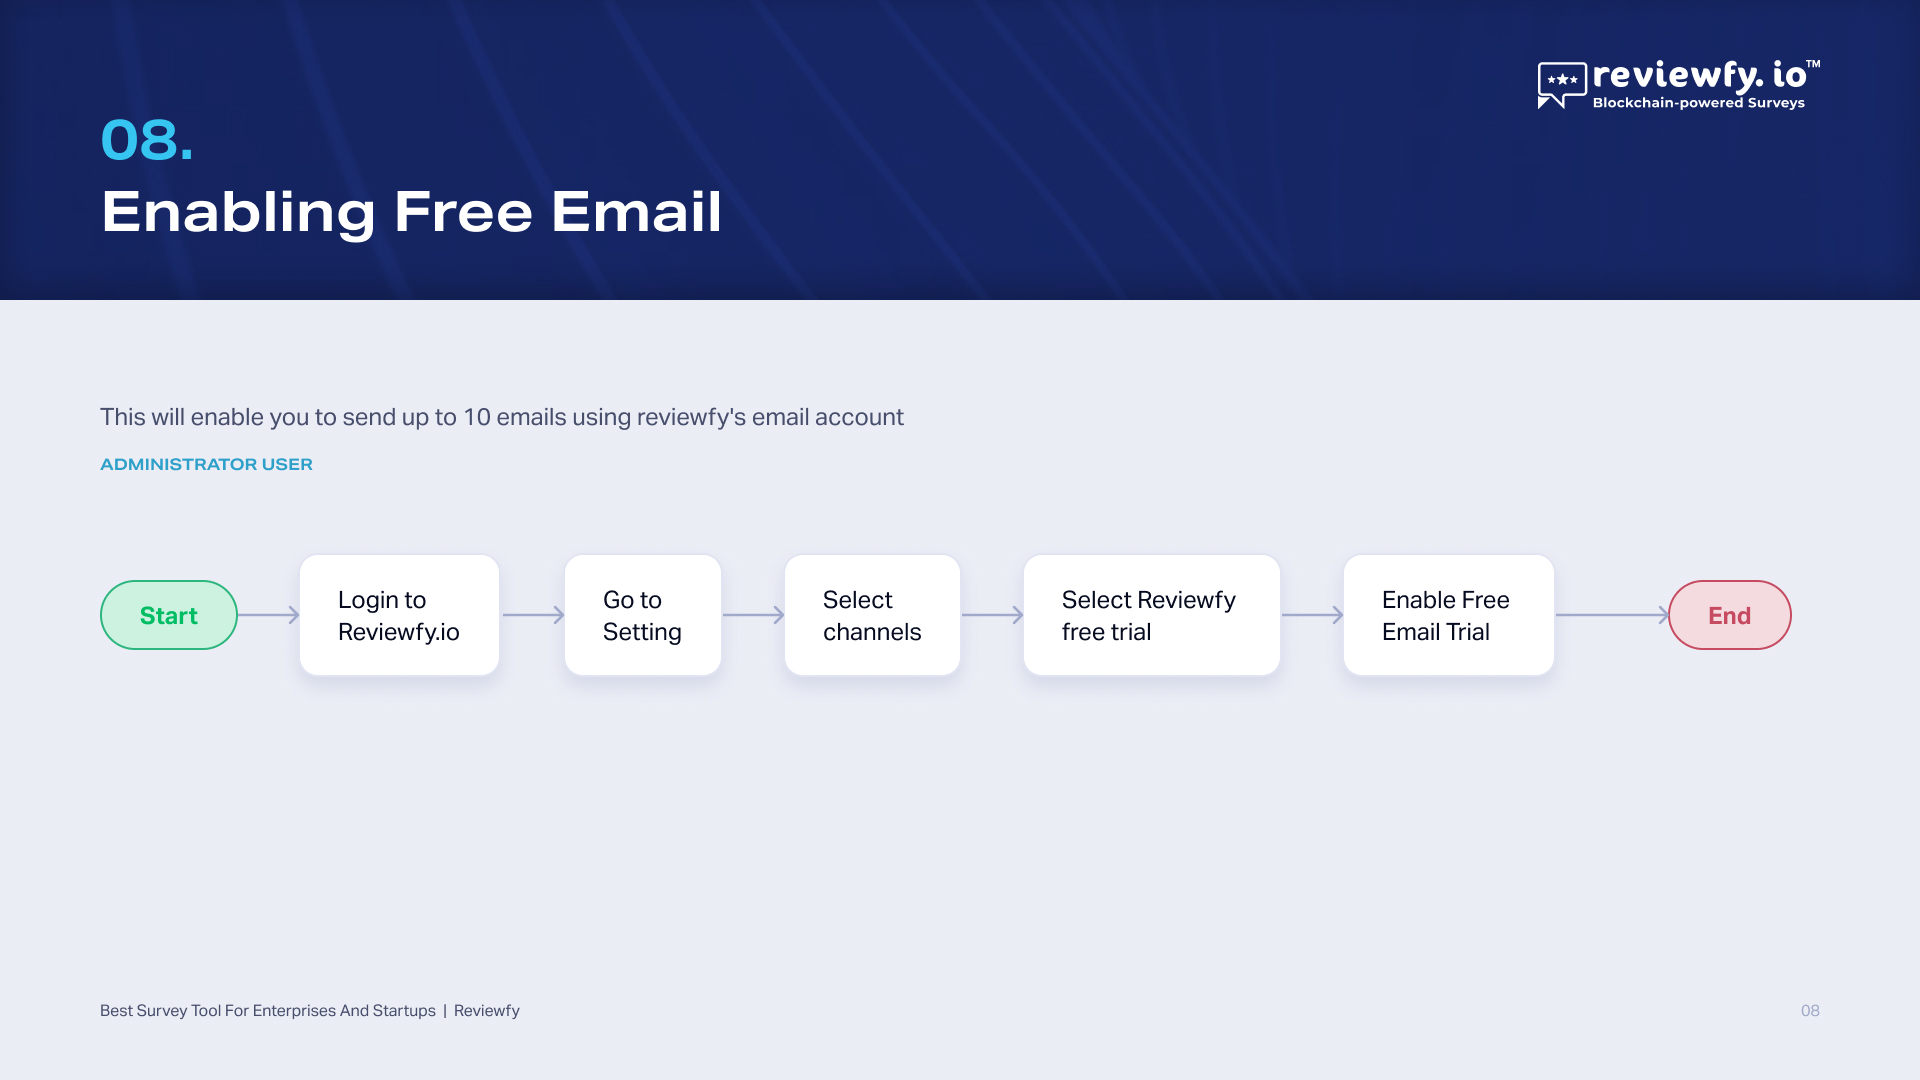
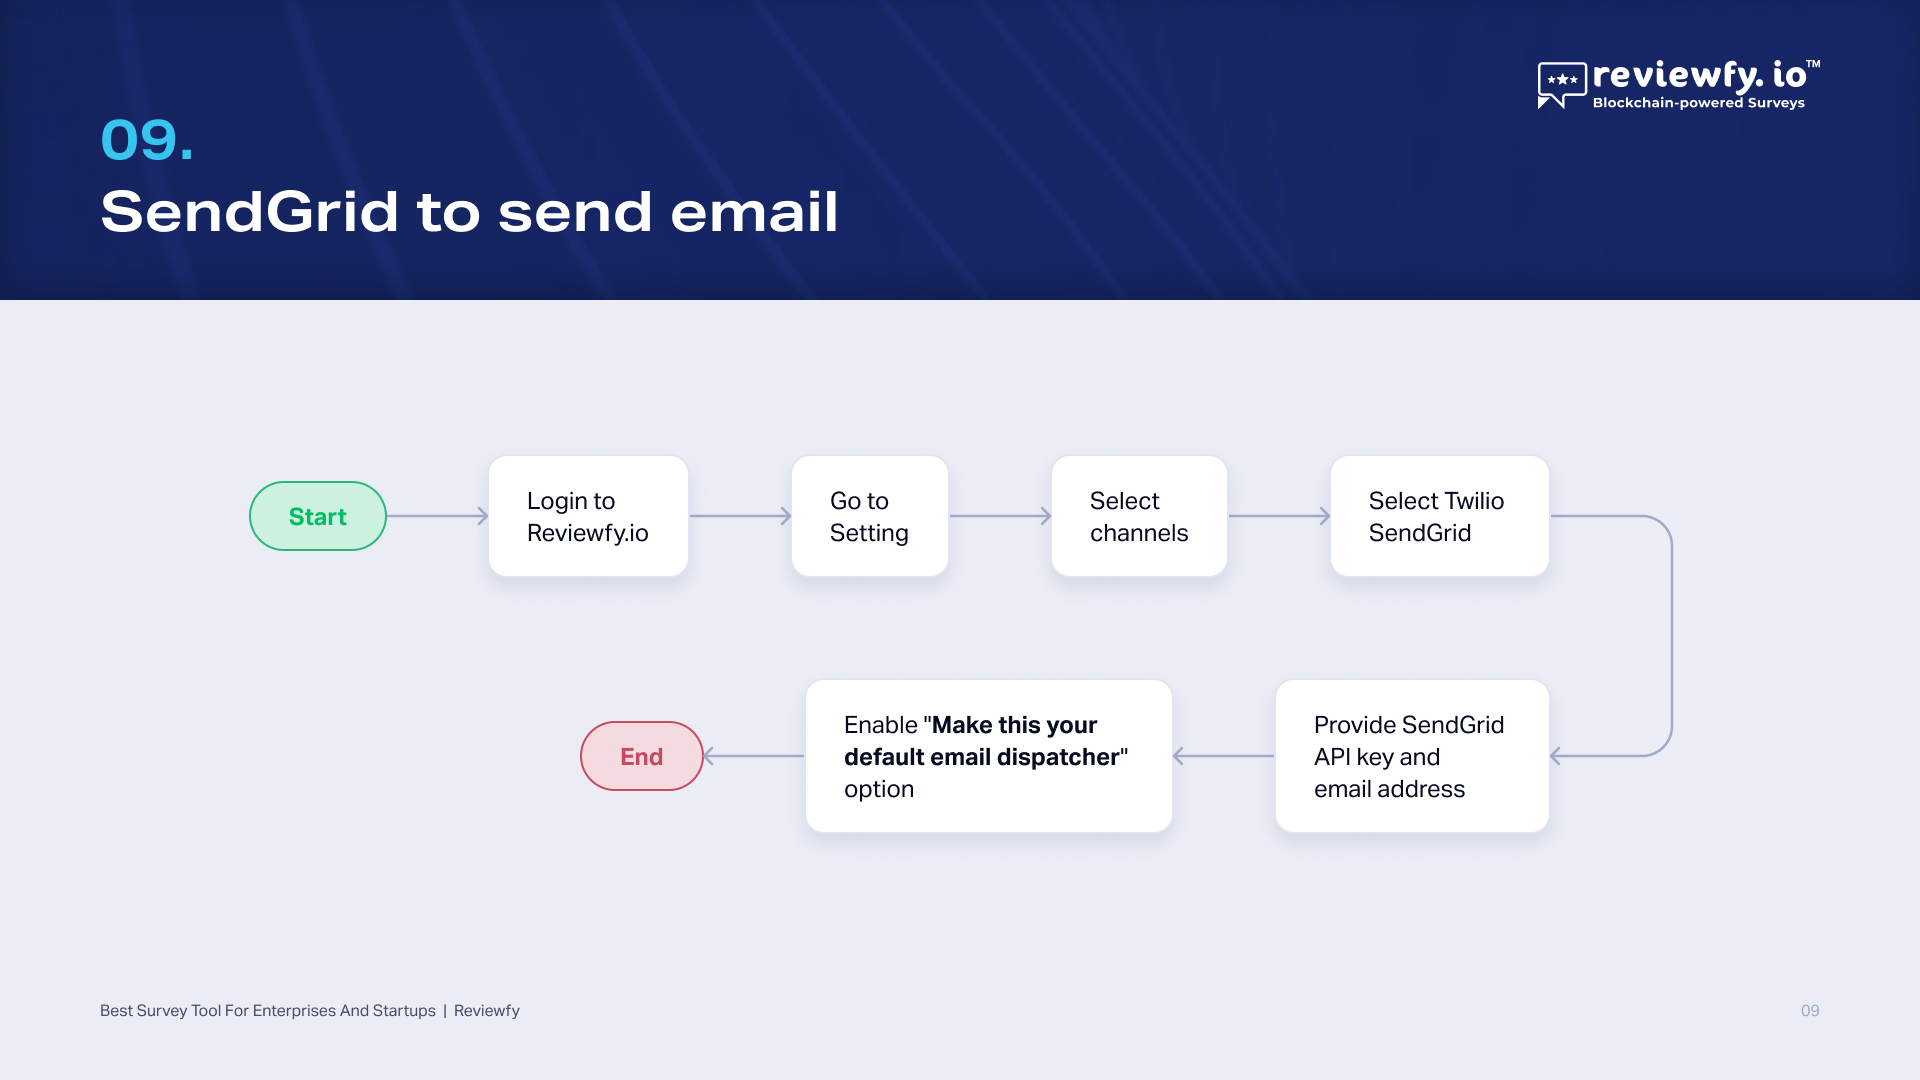
Configure the Reviewfy Free email service for 10 emails as a trial
- Go to Settings
- Configuration dash board is shown
- Click on Channels
- There are 4 Channel configuration options visible:
- Reviewfy Free Trial
- Twillio SendGrid
- Your Corporate email
- WhatsApp Business
- Click on Reivewfy Free Trial
- Use the toggle button to activate this service
- After each email despatch, the number keeps reducing until it becomes “0” (from 10)
You have the option of by-passing this to configure the other channels using API.
Creating Questions
Landing : Dash Board
- Open Form Management section
- Tap Question Library
- Go to Create Question
- Choose Icon (you can select any pre-loaded icon or you can upload your own icon)
- Drag the icon to the centre of the questionnaire
- Formulate your question in the box provided for
- Select the type of response from the drop down menu
- The question is now visible in the Question Library
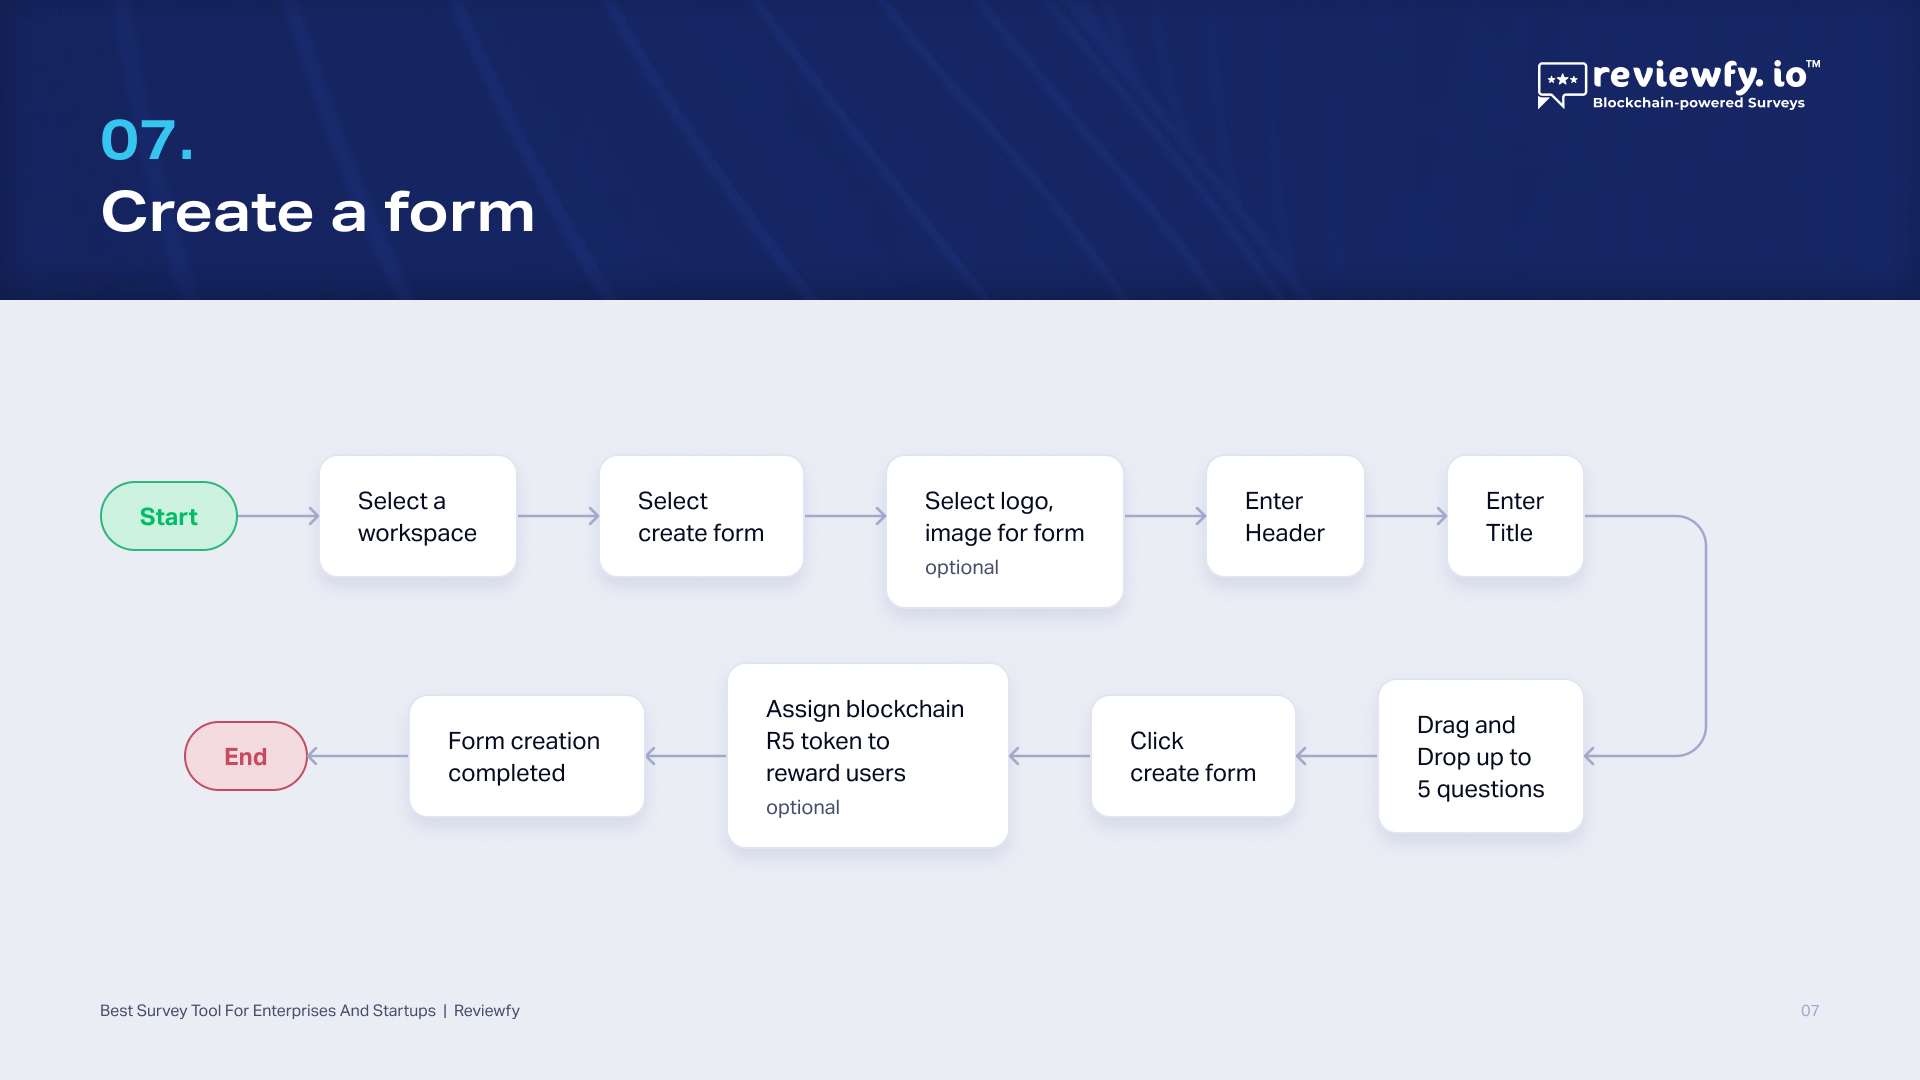
Creating Surveys
- Go to Forms and Create Form
- Add your Brand / Company Logo from your files
- Give a title to the survey (adjacent to the Logo)
- Add a brief message to the respondent
- The Questions that you created all appear in the left side panel
- Drag and Drop the questions (contents) into the space given for creating the form
- You can select a maximum of 5 Questions only
- After this, click again Create Form icon
- The Preview of the Survey Form appears in the right side panel. Go to Next
- The Panel opens : You can select the option of distributing R5 Tokens
- If you Select “Yes”, you have to enter the number of tokens that you want to distribute for each response.
- Submit: Create Form
- The Survey Form with the Logo and Title of the survey appears
- The Survey is ready to be sent to your customers
Rolling out Surveys
- Open the Form Dispatcher
- The Form to be sent appears in the right side panel
- The option to send the form to an individual or to a group of customers is available
- The list of services to be used to despatch the survey form is available in the left panel
- Give a subject line to the survey form
- Drag the Survey Form from the left panel to the body
- Apply “Send”
- See the message “ Email Dispatched” at the right hand top corner
Approving Response / Response Analysis in Dash Board
- Go to Review Responses in the Dash Board
- The list of responses (respondent’s email id, name of the Form, token allotted etc) appear
- Select the response and apply “Approve”
- The Metamask window opens and this contains the estimated Matic (gas fee)
- Submit ‘Confirm’
- After “transaction completed” message appears, go to Approved Responses
- The details about the “Approved Responses” appear
- Go to Dash Board
- Apply “Form Reviews”
- Select the Form from the drop down (Select a form to view insights)
- The complete analysis for each respondent’s review is available to see
- You can download the details (apply the date range option)
This means that the allotted R5 Tokens have now been transferred to the wallet of the individual survey respondent.
